-
Release Notes
- July 8, 2024
- May 22, 2024
- April 17, 2024
- March 20, 2024
- February 22, 2024
- January 18, 2024
- 2023 Releases
- 2022 Releases
-
2021 Releases
- December 20, 2021
- December 1, 2021
- November 22, 2021
- November 4, 2021
- October 26, 2021
- September 30, 2021
- September 22, 2021
- September 2, 2021
- August 16, 2021
- August 2, 2021
- July 19, 2021
- July 1, 2021
- June 17, 2021
- June 1, 2021
- April 30, 2021
- April 8, 2021
- March 25, 2021
- March 15, 2021
- February 25, 2021
- February 8, 2021
- January 28, 2021
- January 21, 2021
- January 13, 2021
- 2020 Releases
- Getting Started
- Ports
- Cross Connects
- Point-to-Point
- Virtual Circuits
- Cloud Connections
- Cloud Router
- Marketplace & IX
- Administration
- Billing
- Troubleshooting & FAQ
- Technical Reference
- Partners Portal
- API & Automation
Create a LAG
Prerequisites
You must already have one or more provisioned PacketFabric ports.
Requirements for ports in a LAG:
-
Single-port LAG
- The port cannot have any virtual circuits attached. You can see whether a port has virtual circuits by visiting its details page in the portal.
-
Multi-port LAG
All ports must share the same:
- Location
- Zone
- Speed
- Media
- No virtual circuits currently attached
You can add virtual circuits back to the ports after they have been added to the LAG.
Create a LAG
-
Log in to the PacketFabric portal. Select Ports in the menu on the left.
-
Click Create LAG in the upper right.
NOTE: If you do not see this action, your user account might not have the appropriate permissions. -
Under Select LAG Members, your existing ports are grouped together by site and zone. Only ports without a virtual circuit are shown.
If you are selecting multiple ports, they must have the same media and speed.
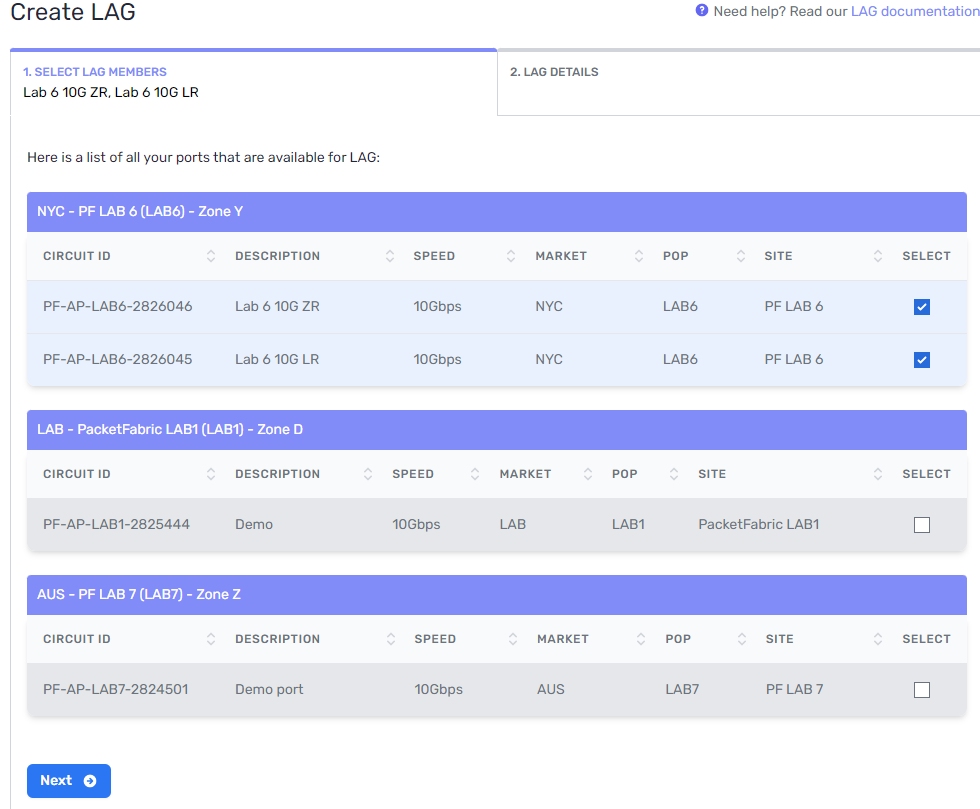
-
Under LAG Details, enter a meaningful name for the LAG and select the LACP interval.
The LACP interval determines the frequency in which LACP control packets (LACP PDUs) are sent. This in turn determines the timeout value of 3 or 90 seconds. If a PDU is not returned from the remote connection within the allotted time, the LACP session drops.
You can later change the LACP interval from the LAG details .
-
Click Create LAG
When you return to your interfaces dashboard, the ports you selected are now grouped together under your LAG.
Click the LAG to open the side panel, where you can view its members:
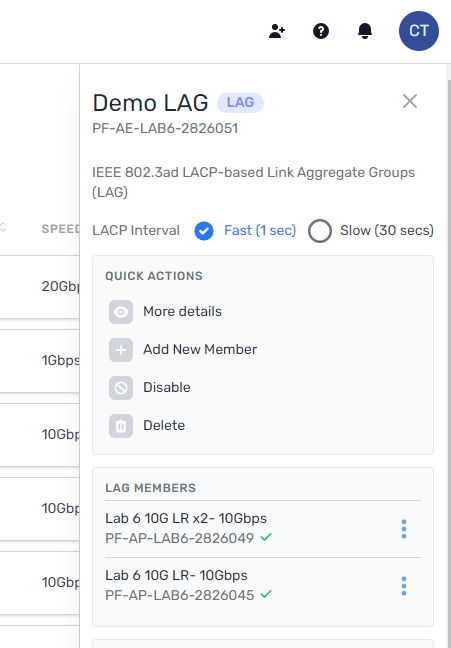
From here you can also modify, delete, and disable the LAG.
Related links
Related APIs
Updated on 22 Feb 2023