Add an Azure ExpressRoute Connection to a Cloud Router
Process overview
The basic steps to adding an Azure connection to a PacketFabric Cloud Router are as follows:
- From the Microsoft side: Create an ExpressRoute circuit in the Azure portal .
- From the PacketFabric side: Create a Cloud Router connection .
- From both sides: Configure BGP .
- From the Microsoft side: Create a virtual network gateway for ExpressRoute .
- From the Microsoft side: Link a virtual network gateway to the ExpressRoute circuit .
Create an ExpressRoute circuit in the Azure Console
-
From the Microsoft Azure portal, use the search bar to find the ExpressRoute circuits page.

-
Click Create.

-
Under Basics, complete the following fields:
-
Header row
- Field
- Description
-
Row 1
- Subscription
- Your subscription is created at the account level and determines how you are billed.
-
Row 2
-
Resource group
-
The resource group is like a directory folder. You can use resource groups to perform bulk operations on resources. For example, you can cascade permissions, create copies, delete groups, and so on.
Each resource can only belong to one group, and the group can only belong to one subscription.
-
-
Row 2
-
Region
-
Select the Azure region that works best for you. This region represents the availability zone or data center in which a resource is located.
The region does not need to be the same as the PacketFabric on-ramp. For example, you might want to keep resources that are in a group within the same region or spread them among various regions for redundancy.
-
-
Row 2
- Name
- Provide a meaningful name for the circuit.
-
-
Under Configuration, complete the following fields:
- Header row
- Field
- Description
- Row 1
- Port type
- Select Provider.
- Row 2
- Create new or import from classic
- Create new.
- Row 2
- Provider
- Select PacketFabric.
- Row 2
- Peering location
- Select from the available locations. This is the PacketFabric on-ramp.
- Row 2
- Bandwidth
- Select your capacity.
- Row 2
-
SKU
-
Select your service tier.
The Premium add-on allows connectivity between geopolitical regions, more prefixes, and more virtual network connections. For more information, see Microsoft - What is ExpressRoute premium?
-
- Row 2
-
Billing model
-
Select the appropriate billing model.
This only applies to Microsoft’s billing model. All PacketFabric hosted cloud connections are billed separately and at a flat monthly rate.
- Metered: Billed according to usage.
- Unlimited: Pay a flat monthly rate.
-
- Row 2
-
Allow classic operations
-
No - This is the default selection, and is appropriate in most situations.
You would only need to select Yes if you are planning to connect to resources that were deployed under Azure’s classic model. This would include any resources created before 2014 that have not been migrated and/or post-2014 resources that you created through the classic portal.
-
- Header row
-
Under Tags, you can optionally add name/value pairs. Tags allow you to organize resources across resource groups. They can be applied to subscriptions, resource groups, and resources.
For example, you could use tags to note location (e.g.
city: richmondorbuilding: d) and environments (e.g.environment: testorstate: beta). -
Review your selections and click Create.
-
It might take a few moments for your circuit to deploy. When complete, click Go to resource.
 NOTE: If you do not see the Go to resource action, click Refresh or go to the resources page and re-select the ExpressRoute circuit.
 -
From the ExpressRoute circuit overview page, locate the service key and copy it to your clipboard.

Create a PacketFabric Cloud Router connection
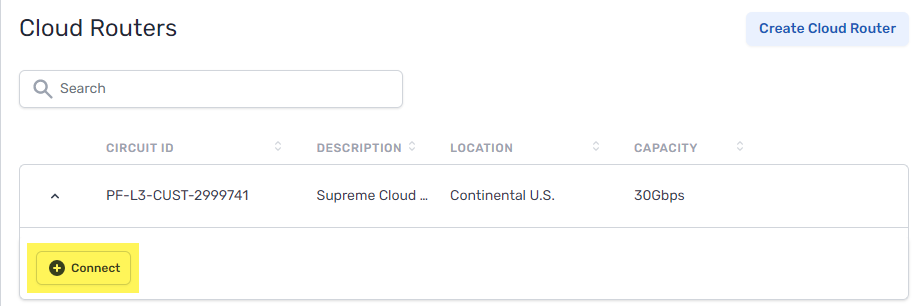
Log in to the PacketFabric portal and select Cloud Routers on the left.
Expand the Cloud Router you are using and click Connect.
Select cloud provider
Select Microsoft Azure.
Configure
- Enable Network Address Translation
- Select this option if you want to be able to use NAT for the connection. This ensures the connection will provision on a device that supports NAT.
- Source NAT – Translate the source IP address. For example, you can translate a pool of private IP addresses to a public IP address in order to reach an external resource that only accepts public IPs.
- Use a public IP for SNAT pool prefix – Select this option to obtain a public IP address to use with your SNAT configuration. This option is not available if you also select Use public IP, because in that case you would already be assigned a public IP to use for SNAT.
- Destination NAT – Translate the destination IP address. For example, if you need to translate a public IP address to a private IP addresses in your network. This may be necessary if you plan to make the connection exportable via Quick Connect.
- Speed
- This is the speed/capacity you are setting for the connection.
- Azure Service Key
- Enter the Azure service key that you copied from the ExpressRoute circuit overview page.
- Description
- Enter a description for the connection.
- Use public IP
- Select this option to be assigned a public IP address to use with this connection. This is necessary if you are planning on using Microsoft peering, meaning that you will be connecting to public Microsoft services such as Microsoft 365.
Under the billing section on the right, select a term and the appropriate billing account to use. You can also optionally specify a PO number to associate with the service. The PO number will be included on your monthly invoice.
Click Place order.
Next steps
- Set up peering and configure BGP.
- Create a VNet gateway in the Azure portal.
- Connect your VNet gateway to your ExpressRoute circuit.
For information on completing these steps, see Configure BGP for Azure .