-
Release Notes
- July 8, 2024
- May 22, 2024
- April 17, 2024
- March 20, 2024
- February 22, 2024
- January 18, 2024
- 2023 Releases
- 2022 Releases
-
2021 Releases
- December 20, 2021
- December 1, 2021
- November 22, 2021
- November 4, 2021
- October 26, 2021
- September 30, 2021
- September 22, 2021
- September 2, 2021
- August 16, 2021
- August 2, 2021
- July 19, 2021
- July 1, 2021
- June 17, 2021
- June 1, 2021
- April 30, 2021
- April 8, 2021
- March 25, 2021
- March 15, 2021
- February 25, 2021
- February 8, 2021
- January 28, 2021
- January 21, 2021
- January 13, 2021
- 2020 Releases
- Getting Started
- Ports
- Cross Connects
- Point-to-Point
- Virtual Circuits
- Cloud Connections
- Cloud Router
- Marketplace & IX
- Administration
- Billing
- Troubleshooting & FAQ
- Technical Reference
- Partners Portal
- API & Automation
Add a Connection from a Port to the Cloud Router
If you are present in a shared data center location and have already provisioned a PacketFabric port, then you can connect that port to a Cloud Router.
This allows you to use the PacketFabric SDN to access your Cloud Router traffic directly from your on-premises environment.
Prerequisites
Before you begin, you must already have provisioned an access port. For more information, see Create a Port .
Create a PacketFabric Cloud Router connection
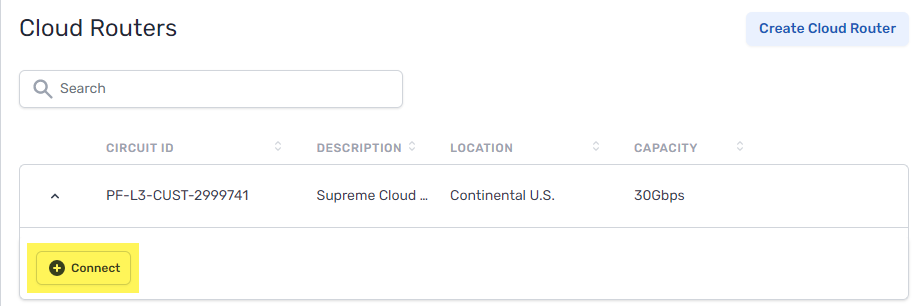
Log in to the PacketFabric portal and select Cloud Routers on the left.
Expand the Cloud Router you are using and click Connect.
Select cloud provider
Select Dedicated Port.
Configure
- Select a port
- Select your source port.
- Enable Network Address Translation
- Select this option if you want to be able to use NAT for the connection. This ensures the connection will provision on a device that supports NAT.
- Source NAT – Translate the source IP address. For example, you can translate a pool of private IP addresses to a public IP address in order to reach an external resource that only accepts public IPs.
- Destination NAT – Translate the destination IP address. For example, if you need to translate a public IP address to a private IP addresses in your network. This may be necessary if you plan to make the connection exportable via Quick Connect.
- Speed
- This is the speed you are setting for the connection.
- Description
- Enter a name for the connection.
-
NOTE: The number symbol
#is not permitted in connection descriptions. - Source VLAN
- Specify a VLAN ID for your source port.
- You can manually enter the ID or click Next Available. If you click Next Available, we find the highest in-use VLAN ID and increment by one. For example, if the highest in-use ID is 15, this field autopopulates with 16. By default, these fields are already populated with the next available VLAN ID.
- Use public IP
- Select this option to have PacketFabric provide a public IP address to use for your BGP session.
Under the billing section on the right, select a term and the appropriate billing account to use. You can also optionally specify a PO number to associate with the service. The PO number will be included on your monthly invoice.
Click Place order.
Next steps
Before you can begin transferring data, you must set up BGP for this connection. See Configure BGP for Port Connections .
Related APIs
Updated on 02 Mar 2026