Create a Dedicated AWS Connection
Prerequisites
- An AWS account.
- Review the following pages to decide which site you want to set up your connection.
- AWS Direct Connect Pricing
- AWS Direct Connect Partners (scroll down for a list of partner sites)
Overview
A dedicated cloud interconnect provides a secure, private, high-bandwidth connection between you and AWS.
Complete the following steps:
- From the PacketFabric portal, create a dedicated cloud connection .
- From the AWS portal, create a Direct Connect connection in the same location as your dedicated cloud connection.
- Wait up to 72 hours for Amazon to review and approve the connection.
- From the AWS portal, download the LOA-CFA and use it to order a cross connect in the PacketFabric portal.
- From the PacketFabric portal, create a virtual circuit from your source interface to the PacketFabric-AWS Direct Connection connection.
- From the AWS portal, create a virtual interface to complete your Direct Connect connection.
Create a Dedicated Cloud Connection
Log in to the PacketFabric portal.
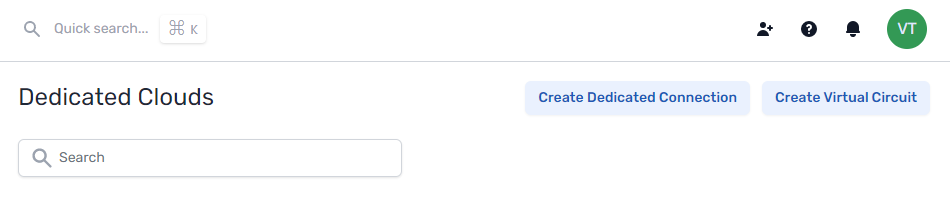
From the Dedicated Clouds page, click Create Dedicated Connection in the upper right:

Complete the following fields:
Select Cloud Provider
Select AWS.
Destination Port
Select the cloud on-ramp port. This is the port that will have a cross connect to AWS.
Configuration
Select one of the following:
-
Metro: Your source ports are in the same metro market as your PacketFabric-AWS connection (the destination port you selected in the previous step). This means that you can only access this dedicated cloud on-ramp from your other PacketFabric ports within the same metro/city.
For example, your source port is in Equinix DC2 (Ashburn, VA; WDC1), and your PacketFabric-AWS connection is in CoreSite VA1 (Reston, VA; WDC2). Both are in the Washington D.C. metro market.
-
Long-haul: Your source ports are not in the same metro market as your PacketFabric-AWS connection. This means you can access this dedicated cloud on-ramp from any PacketFabric interface within the same region.
For example, your source interface is in Digital Realty NJR2 (Clifton, NJ; NYC12), and your PacketFabric-AWS connection is in CoreSite VA1 (Reston, VA; WDC2).
- Speed
- The on-ramp port capacity.
- Create as a LAG
- Select this option to create a single-member LAG (enabling LACP).
- Autonegotiation
- This option is only available for 1Gbps ports.
- Zone
- Select a zone.
- The zone refers to the physical interconnect diversity between PacketFabric and AWS (e.g. different routers).
- Allocating connections within different zones supports redundancy.
- Description
- Enter a name for the connection.
Under the billing section on the right, select a term and the appropriate billing account to use. You can also optionally specify a PO number to associate with the service. The PO number will be included on your monthly invoice.
Click Place order.
Create an AWS Direct Connect connection
Follow Amazon’s instructions to set up a Direct Connect connection: Creating a Connection - AWS Direct Connect .
Note the following when creating your Direct Connect connection:
-
The location you select must be the same site you selected under Destination Interface when you set up your PacketFabric dedicated cloud interconnect.
-
When creating your connection, ensure that you select PacketFabric as your service provider:
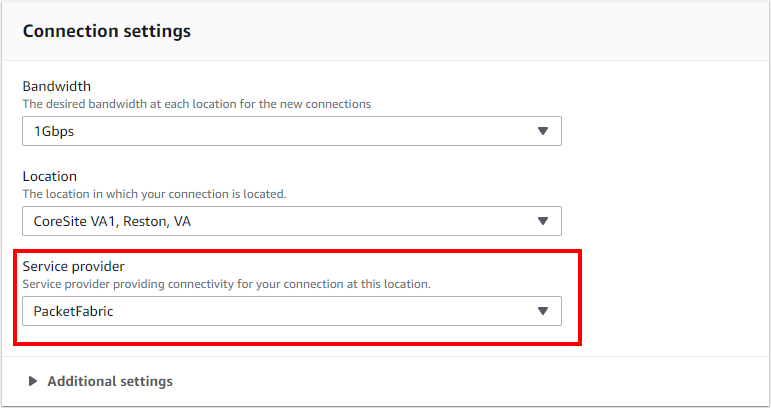 NOTE: If you do not see PacketFabric in the service provider drop-down list, first check to ensure the location matches the one you selected in the PacketFabric portal.
Once this has been verified, select Other and manually enter PacketFabric as your service provider.
Build a cross connect
Amazon reviews your request and you are notified when it has been approved.
Once approved, log in to the AWS portal and download your LOA-CFA. You can upload this to the PacketFabric portal to order the cross connect.
-
From the PacketFabric portal, go to the Dedicated Cloud page.
-
Click the connection to open its side panel. Click Create Cross Connect.

-
Provide a description for the cross connect.
-
Upload the LOA in the field provided.
-
Click Next
-
The Billing page provides the NRC (non-recurring costs), MRC (monthly recurring costs), and any additional costs (such as a disconnection fee). These fees vary by site.
-
Select a billing account.
-
Click Place order.
You are redirected to the connection details page. From here you can track the progress of the cross connect installation. For more information, see Cross Connects .
Add a virtual circuit
-
From the PacketFabric portal, go to the Dedicated Cloud page.
-
Click Create Virtual Circuit in the upper right of the page.
Complete the following fields:
Select Source
Select the source port. The source port is the PacketFabric port connected to your network.
Select Cloud Provider
Select a dedicated cloud port.
Configuration
- Speed
- Select the speed/capacity for your virtual circuit. The speeds that are displayed are those that are compatible with the speeds you selected for your source and destination interfaces.
- Source VLAN
- This is the VLAN ID that faces your source interface (your source network).
- You can manually enter the ID or click Next available. If you click Next available, we find the highest in-use VLAN ID and increment by one. For example, if the highest in-use ID is 15, this field autopopulates with 16.
- Select Make source untagged if you do not plan on using VLAN tagging.
- Destination VLAN
- The VLAN ID that faces your cloud virtual interface.
- Select Make destination untagged if you do not plan on using VLAN tagging.
-
TIP: Record this number. You will be asked to provide it when creating your AWS virtual interface.
-
NOTE: For cloud connections, we recommend using the same VLAN ID for both the destination and source.
VLAN IDs can always be added, changed, and removed by editing the virtual circuit.
- Description
- Enter a name for the connection.
Billing
The cost for dedicated cloud virtual circuits is already built into the cost of the port, so all payment terms are $0.00.
Regardless, you still must select the appropriate billing account to associate with this service.
Review your information. When everything is correct, click Place order.
Create an AWS virtual interface
Follow Amazon’s instructions to set up a virtual interface: Creating a Virtual Interface- AWS Direct Connect .
Note the following when creating your virtual interface:
-
For the VLAN field, enter the Destination VLAN ID you provided for your virtual circuit.
-
Under Additional Settings > Jumbo MTU (MTU size 9001), you can optionally select Enabled. All PacketFabric connections support jumbo MTUs.
Next steps
Once your AWS virtual interface has finished provisioning, click the VIF name to view its details. From here you can gather peering information to configure your router.
TIP: Click Download router configuration to download a .txt file with all the necessary router configuration specifications.
