Add AWS Direct Connect to a Cloud Router
The process for adding an AWS connection depends on whether you are using an AWS access key :
- Provision with a key - From the PacketFabric portal you can provision the connection, automatically accept it from the AWS side, and create an associated VIF.
- Provision without a key - From the PacketFabric portal, you only provision the Cloud Router connection. When that is completed, you must return to the AWS Management Console to accept the connection and create the VIF.
Provision using an AWS access key
Prerequisites
- If you haven’t already, generate your AWS access key .
- You must already have at least one AWS VPC with subnets already created. This must be complete through the AWS Management Console.
- You will be asked for your AWS account number. This is available under your user name in the upper right of the AWS Management Console.
Create a PacketFabric Cloud Router connection
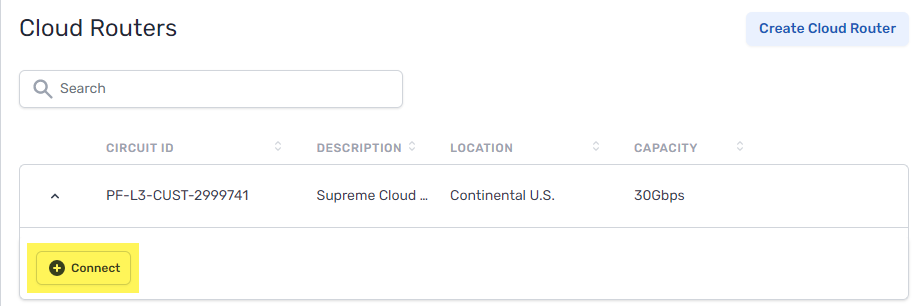
Log in to the PacketFabric portal and select Cloud Routers on the left. Click Connect under the appropriate Cloud Router.
Select Amazon Web Services.
Configure
- Enable Network Address Translation
- Select this option if you want to be able to use NAT for the connection. This ensures the connection will provision on a device that supports NAT.
- Source NAT – Translate the source IP address. For example, you can translate a pool of private IP addresses to a public IP address in order to reach an external resource that only accepts public IPs.
- Use a public IP for SNAT pool prefix – Select this option to obtain a public IP address to use with your SNAT configuration. This option is not available if you also select Use Public VIF, because in that case you would already be assigned a public IP to use for SNAT.
- Destination NAT – Translate the destination IP address. For example, if you need to translate a public IP address to a private IP addresses in your network. This may be necessary if you plan to make the connection exportable via Quick Connect.
- OnRamp
- This is the AWS on-ramp location you would like to use. This cannot be changed after it is provisioned.
- Zone
- Select an availability zone at the on-ramp facility. Allocating connections within different zones supports redundancy. Each availability zone is a unique chassis.
- Speed
- This is the speed/capacity you are setting for the connection.
- Amazon account ID
- Enter your Amazon account ID.
- Description
- Enter a name for the connection.
- Use Public VIF
- Select this option if you are planning to use this connection with a public VIF to reach AWS public resources.
- AWS public resources are resources that are not contained within your VPC. The most commonly used are Amazon S3 and DynamoDB.
- Provision AWS side of the connection
- Select this option.
AWS settings
- AWS credentials
- Select a set of credentials tied to the AWS account ID you entered above or enter new ones.
- If you do not have any credentials set up, see AWS Credentials for information on obtaining them.
Virtual Interface (VIF) type
-
Header row
- VIF
- Description
-
r1
- Private VIF
- Access a single Amazon VPC using a Direct Connect Gateway and a Virtual Private Gateway.
-
r2
-
Transit VIF
-
Access one or more Amazon VPCs using a Direct Connect Gateway and a Transit Gateway.
Note that when provisioning through PacketFabric, you will only be able to select one VPC. You can use the AWS Management Console to attach additional VPCs to the Transit Gateway.
-
-
r3
- Public VIF
- Use public IP addresses to access AWS public services (such as S3) that are not in your VPC. Public VIFs are not attached to gateways.
PacketFabric settings
- Allowed prefixes to cloud
- This is a list of addresses that you want to allow into your AWS VPC from other connections within the Cloud Router. You can add up to 1000 prefixes.
- Row
- Field
- Description
- Row
- Prefix/Mask
- Enter an allowed IP address range in CIDR format.
- Row
-
Match type
-
Whether the allowed prefix must match exactly or whether it uses an
orlongerfilter.For example,
172.16.2.0/24or longer would also allow172.16.2.128/25.
-
- Row
-
AS prepend
-
Number of additional times to add the ASN to the BGP path, resulting in a higher path length. Allowed values are integers from 0 to 5.
Routes with higher path length (a higher ASN prepend value) have a lower priority.
-
- Row
-
MED
-
The multi-exit discriminator (MED) value. Allowed values are integers from 0 to 4294967295.
When the same route is advertised in multiple locations, those with a lower MED are preferred by the peer AS.
-
NOTE: If you are using a public virtual interface:
- All incoming traffic must originate from the same public IP block as the PacketFabric Router Peer IP + Mask (CIDR notation) field. This will be automatically configured on your behalf. This typically means you will need to use SNAT.
- If you are using NAT, you can leave this field blank and PacketFabric will automatically configure it with your NAT pool address.
- The prefixes you enter here will automatically be added to the Prefixes you want to advertise field in AWS. While you can edit this list later, doing so will require deleting and recreating the VIF (causing a service disruption). To update this list without causing a service disruption, you will need to open a support case with Amazon.
- AWS drops packets whose source is not in these ranges listed in the Prefixes you want to advertise field configured on the VIF.
- If you are using a public virtual interface on a Cloud Router that has a private ASN, AS prepending does not work.
- Allowed prefixes from cloud
- This is a list of addresses from within the AWS environment that you want to advertise to other connections on the Cloud Router. This can include the VPC internal space and any routes you have created. You can add up to 1000 prefixes.
- When creating private and transit VIFs, this list is used to populate the Direct Connect Gateway association’s allowed prefix list.
- Row
- Field
- Description
- Row
- Prefix/Mask
- Enter an allowed IP address range in CIDR format.
- Row
- Match type
- Allow or disallow longer prefixes for this row (see the description above).
- Row
- Local preference
- When the same route is received in multiple locations, those with a higher local preference value are preferred by the PacketFabric Cloud Router. Allowed values are integers from 0 to 4294967295.
- Advanced settings
- These are optional, and can also be configured later.
- Header row
- Setting
- Description
- r1
- Bidirectional Forwarding Detection (BFD)
- Enable and configure BFD. See BFD settings .
- r2
-
NAT Settings
-
See NAT settings .
NOTE: For public VIFs, you can enter your own public IP address or leave this field blank to allow PacketFabric to assign one on your behalf. You can also leave this field blank if you selected Use a public IP for SNAT pool prefix.
-
Under the billing section on the right, select a term and the appropriate billing account to use. You can also optionally specify a PO number to associate with the service. The PO number will be included on your monthly invoice.
Click Place order.
Provision without an AWS access key
Process overview
The basic steps to adding an AWS connection to a PacketFabric Distributed Cloud Router are as follows:
- From the PacketFabric side: Create a cloud connection .
- From the AWS side: Accept the connection .
- From the AWS side: Create a gateway .
- From the AWS side: Create and attach a VIF .
- From the PacketFabric side: Configure BGP .
Prerequisites
You will be asked for your AWS account number. This is available under your user name in the upper right of the AWS Management Console.
Create a PacketFabric Cloud Router connection
Log in to the PacketFabric portal and select Cloud Routers on the left. Click Create a connection under the appropriate Cloud Router.
Select cloud provider
Select AWS.
Configure
- Enable Network Address Translation
- Select this option if you want to be able to use NAT for the connection. This ensures the connection will provision on a device that supports NAT.
- Source NAT – Translate the source IP address. For example, you can translate a pool of private IP addresses to a public IP address in order to reach an external resource that only accepts public IPs.
- Use a public IP for SNAT pool prefix – Select this option to obtain a public IP address to use with your SNAT configuration. This option is not available if you also select Use Public VIF, because in that case you would already be assigned a public IP to use for SNAT.
- Destination NAT – Translate the destination IP address. For example, if you need to translate a public IP address to a private IP addresses in your network. This may be necessary if you plan to make the connection exportable via Quick Connect.
- OnRamp
- This is the AWS on-ramp location you would like to use. This cannot be changed after it is provisioned.
- Zone
- Select an availability zone at the on-ramp facility. Allocating connections within different zones supports redundancy. Each availability zone is a unique chassis.
- Speed
- This is the speed/capacity you are setting for the connection.
- Amazon account ID
- Enter your Amazon account ID.
- This allows PacketFabric to send API requests to Amazon when creating your connection.
- Description
- Enter a name for the connection.
- Use Public VIF
- Select this option if you are planning to use this connection with a public VIF to reach AWS public resources.
- AWS public resources are resources that are not contained within your VPC. The most commonly used are Amazon S3 and DynamoDB.
- Provision AWS side of the connection
- Skip this option, or follow the instructions above .
Under the billing section on the right, select a term and the appropriate billing account to use. You can also optionally specify a PO number to associate with the service. The PO number will be included on your monthly invoice.
Click Place order.
Accept the connection
-
Sign in to AWS.
-
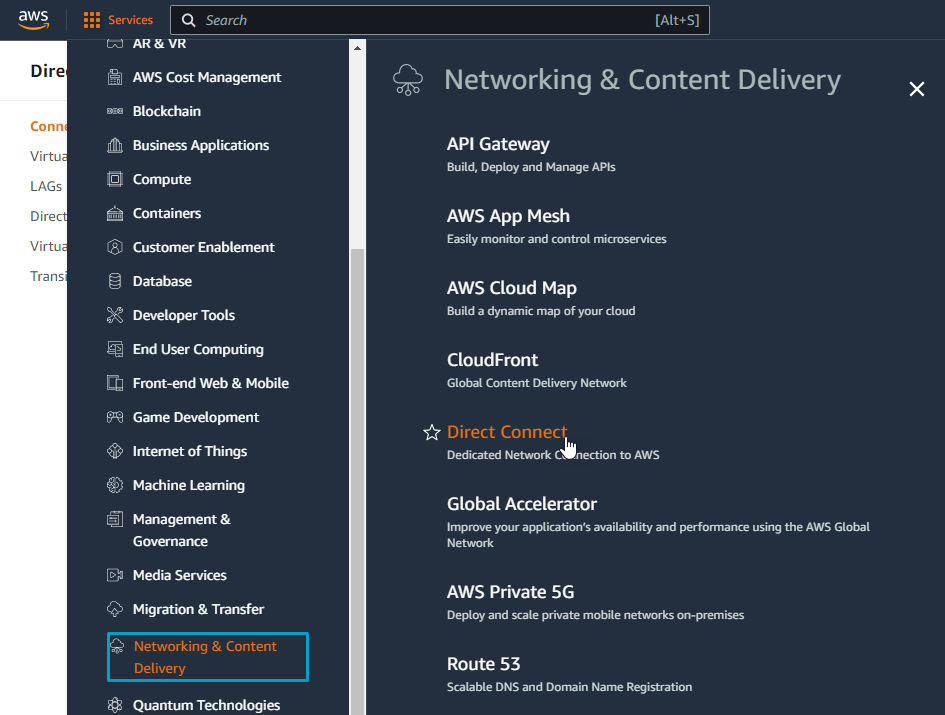
From the AWS Management Console, click the Services menu and select Networking & Content Delivery > Direct Connect.
-
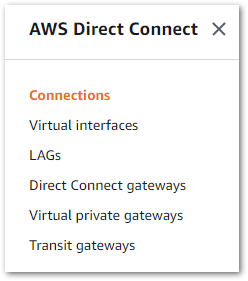
Click Connections.
-
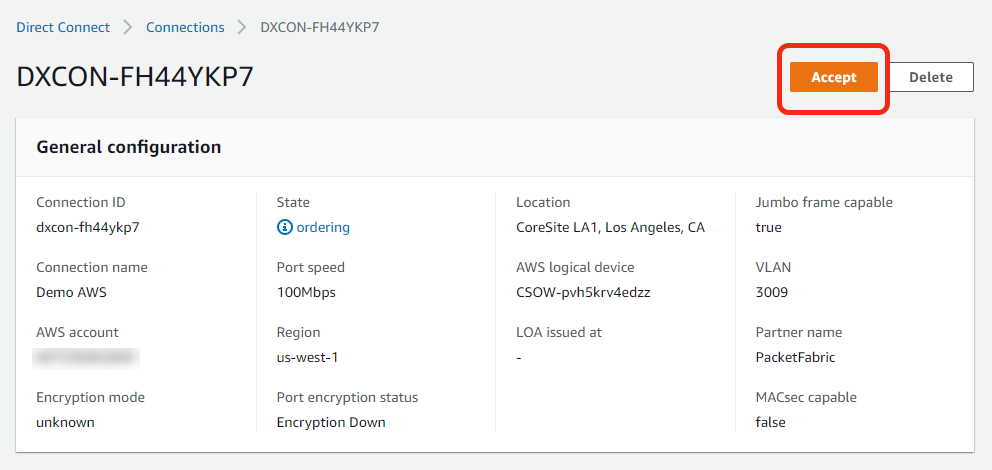
Locate and select the connection you created in the PacketFabric portal.
NOTE: Connections typically appear in the AWS console within a minute after provisioning from PacketFabric.
If you do not see your connection listed, wait a few moments and then refresh the page.
-
Click Accept in the upper right.
-
Click Confirm.
Create a gateway
You can skip this step if you are using the public IP/public VIF option.
Our connections are compatible with all AWS gateway types: Direct Connect, virtual private, and transit.
For information on each, including instructions on how to create them, see the AWS documentation on gateways .
7224. You should instead set this to a private ASN from 62512 - 65534.Create a virtual interface
After accepting the connection, click Create virtual interface.
There are three types of virtual interfaces (VIFs):
Public VIF
Private VIF
Transit VIF
Next steps
Configure the BGP session for this connection .