Add an IBM Direct Link Connection to a Cloud Router
Process overview
The basic steps to adding an IBM Cloud connection to a PacketFabric Cloud Router are as follows:
- From the PacketFabric side: Create a Cloud Router connection .
- From the IBM side: Accept the connection .
- From the IBM side: Add a virtual connection to your IBM virtual private cloud (VPC) .
- From the IBM side: Set up VRF .
- From the PacketFabric side: Configure BGP .
Create a PacketFabric Cloud Router connection
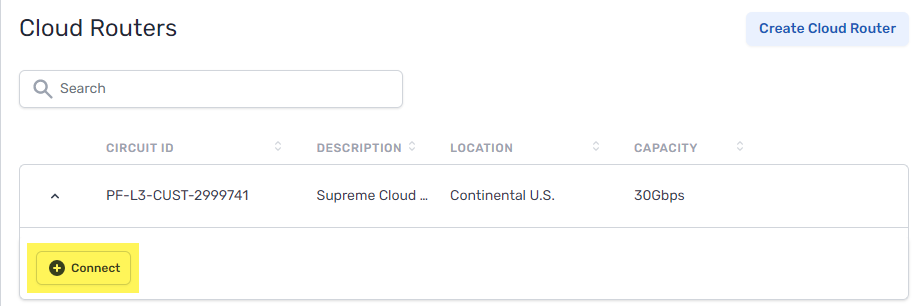
Log in to the PacketFabric portal and select Cloud Routers on the left.
Expand the Cloud Router you are using and click Connect.
Select cloud provider
Select IBM Cloud.
Configure
- Enable Network Address Translation
- Select this option if you want to be able to use NAT for the connection. This ensures the connection will provision on a device that supports NAT.
- Source NAT – Translate the source IP address. For example, you can translate a pool of private IP addresses to a public IP address in order to reach an external resource that only accepts public IPs.
- Destination NAT – Translate the destination IP address. For example, if you need to translate a public IP address to a private IP addresses in your network. This may be necessary if you plan to make the connection exportable via Quick Connect.
- OnRamp
- This is the IBM on-ramp location you would like to use. This cannot be changed after it is provisioned.
- Zone
- Select a zone.
- PacketFabric availability zones represent physical diversity; each availability zone is a unique chassis. Allocating connections within different zones supports redundancy.
- Speed
- This is the speed/capacity you are setting for the connection.
- IBM account ID
- Enter your IBM account ID.
- This allows PacketFabric to send API requests to IBM creating your connection. You can find this on the Account Settings page in the IBM portal. If you cannot view this page, you will need to contact the account owner to get the ID.
- Description
- Enter a name for the connection.
-
NOTE: This is used as the connection name in IBM Cloud, so it must follow the IBM Cloud naming rules. It can only contain letters, numbers, underscores, and dashes.
- User CIDR
- (Optional) The IP address for the router that you are using in your BGP session with IBM.
- IBM CIDR
- (Optional) The IP address for the IBM-side router in the BGP session.
NOTE: If you leave these fields blank, IBM assigns IP addresses for the BGP session.
If you want to specify a CIDR (for example, to avoid conflicts with a subnet), then note the following:
- You cannot enter a CIDR in one field and leave the other blank. You must enter a value for each.
- IBM allows the following IP address ranges:
10.254.0.0/16172.16.0.0/12192.168.0.0/16169.254.0.0/16- A public IP address that you own
- The CIDRs chosen from one of the IP address ranges above must use subnet mask
/29,/30, or/31. For example,10.254.0.0/30and10.254.0.1/30.
Under the billing section on the right, select a term and the appropriate billing account to use. You can also optionally specify a PO number to associate with the service. The PO number will be included on your monthly invoice.
Click Place order.
Accept the Direct Link connection
-
Log in to the IBM Cloud portal.
-
Click the navigation menu in the upper right and select Interconnectivity.

-
Click Direct Link.
-
Locate and expand the Direct Link connection you created earlier.
-
Click Review.

-
If everything is correct, click Accept.
If something is incorrect and you reject the connection, the PacketFabric connection automatically deletes. -
Under Finalize creation, complete the following fields:
- Header row
- Field
- Description
- Row 1
- Resource group
- A resource group allows you to manage billing and cascade permissions to resources within that group.
- Row 1
- Billing
- This determines how IBM bills you for the Direct Link connection. This is separate from PacketFabric’s billing. For more information, see IBM’s Direct Link pricing.
- Metered: You are charged a port fee based on bandwidth, and then are charged on a per-GB basis for data transfer. The data transfer cost depends on location.
- Unmetered: You are charged a flat fee for both the port and data transfer.
- Row 1
- Routing
-
- Local: Includes unlimited ingress and egress traffic, but you can only reach IBM Cloud resources within your local market. For more information, see Direct Link Overview.
- Global: You can reach IBM Cloud resources anywhere outside the local market, but you are charged an additional flat fee. For more information, see Pricing for the global routing add-on.
- Row 1
- MD5 authentication
- (Optional) Set up an authentication key. You must have an IBM keystore set up first. See IBM - Setting up BGP Message Digest 5 (MD5) authentication keys.
- Header row
-
Review and accept the IBM Direct Link terms and prerequisites.
-
Click Create.