Terraform with PacketFabric
The PacketFabric Terraform provider allows you to create, manage, and update PacketFabric services using Terraform.
Useful links
- PacketFabric provider in the Terraform registry
- PacketFabric provider Github repo
- PacketFabric documentation in the Terraform registry
- Use case examples of using the PacketFabric provider
- Introduction to Terraform
- Terraform Language
- Best practices for using Terraform
- Automate Terraform with GitHub Actions
- Automate Terraform with Terraform Cloud
Install Terraform
Complete installation instructions can be found here: Install Terraform
Ensure you have also added the Terraform directory to your PATH variable (see the link above for instructions).
Create a working directory for your Terraform projects
Create a new folder to be your working directory.
You will create two files:
main.tf
Open a new file in a text editor and add the following:
terraform {
  required_providers {
    packetfabric = {
      source = "PacketFabric/packetfabric"
      version = ">= 0.6.0"
    }
  }
}

provider "packetfabric" {}
Change version to match the version you are working with. You can find this in Github (the release identifier) or on the Terraform registry page
:

So given the example above, you would modify your file to read version = "0.1.0".
Save this file as main.tf.
variables.tf
Open a new file in a text editor.
Copy the contents of the examples\variables.tf file from the PacketFabric provider repo.
- Go to https://github.com/PacketFabric/terraform-provider-packetfabric.
- Click the
examplesfolder. - Open
variables.tf. - Click Copy raw contents:
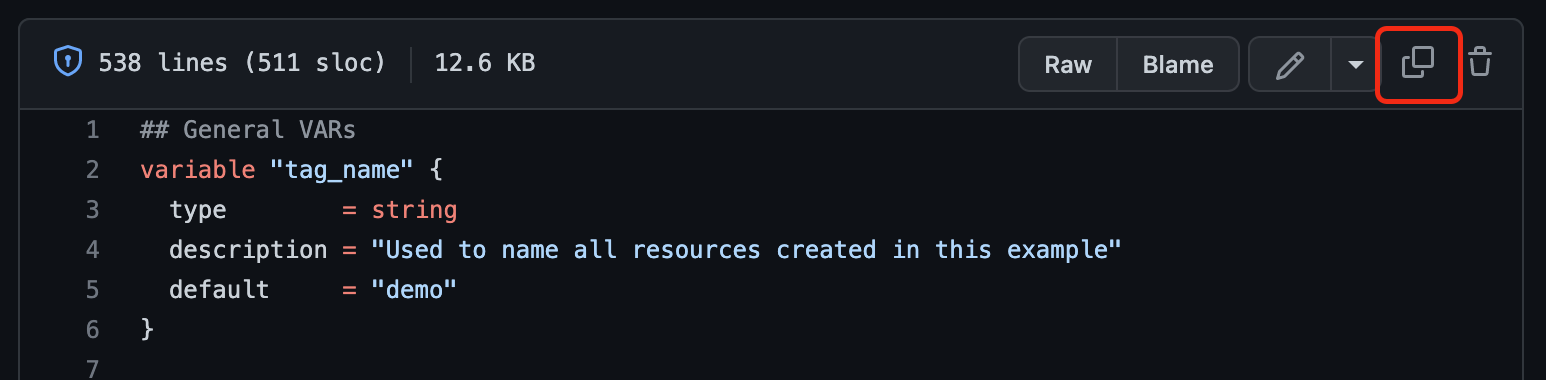
-
Paste into your new file.
-
Save this file as
variables.tf.
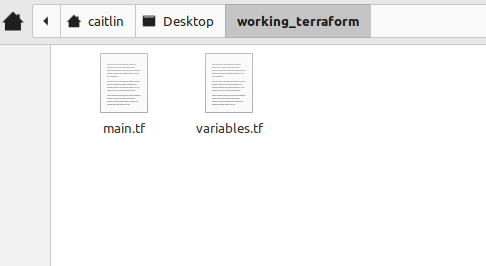
At this point, the directory should have two files: main.tf and variables.tf:
Set your variables
Set the API key
Credentials can be provided by using the PF_TOKEN, and optionally PF_USER and PF_PASSWORD environment variables.
Set the value of PF_TOKEN to an API key that you control (this must be an API key and not a session token).
For more information, see API Keys .
For example:
export PF_TOKEN="secret"Set account UUID
To provision any new service, you will need to have your billing account ID. For information on finding this ID, see Get the Account UUID .
Once you have an ID, set the value of PF_ACCOUNT_ID environment variable. For example:
export PF_ACCOUNT_ID="34ff9ffb-9bbf-43b1-9cf8-6c8e62370597"From here you can use the /examples/ directory in the repo for examples on how to manage PacketFabric resources, or see the PacketFabric documentation in the Terraform registry
.
If you are unfamiliar with Terraform resources, follow the steps below for an example on how to use Terraform to create a PacketFabric Cloud Router.
Example: Create a new Cloud Router
The following steps will lead you through the basic set up and then creating a Cloud Router using Terraform.
Set the Cloud Router variables
Open variables.tf and review the Cloud Router default variables. Make any changes you’d like. For this example, we will leave the default values.
# PacketFabric Cloud Router Parameter configurations

variable "pf_cr_asn" {
  type = number
  default = 4556  # Note - This example added the 4556 default. This should be already set in future versions.
  nullable = false
}

variable "pf_cr_name" {
  type = string
  nullable = false
  default = "PF New Router"
}

variable "pf_cr_capacity" {
  type = string
  default = "1Gbps"
}
variable "pf_cr_regions" {
  type = list(string)
  default = ["US"]
}
For more information about the variables, see the Cloud Router resource example .
Update main.tf with the steps to create a new Cloud Router
This is what Terraform uses to find your existing Cloud Routers and create a new one.
Copy the following into main.tf:
|
|
NOTE: The code above was copied from examples/resources/cloud_router/resource.tf.
As you continue to work with the PacketFabric provider, use the examples directory to find and copy code to use for creating and managing resources.
Initialize Terraform
Open a terminal in your working directory and enter the following command: terraform init
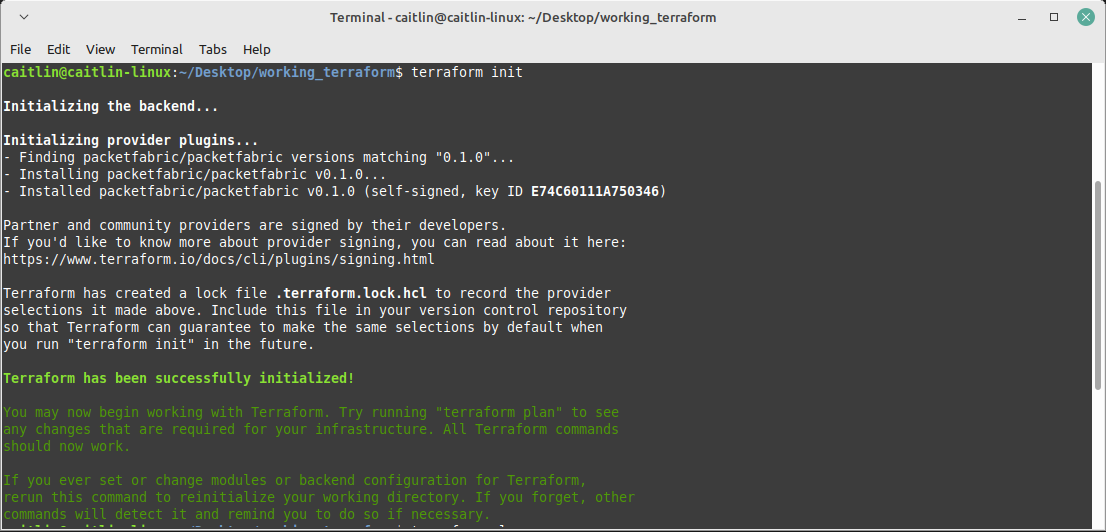
This will display any error messages regarding your configuration. Once the errors are resolved and the command executes successfully, it will add a .terraform sub-directory to your working folder.
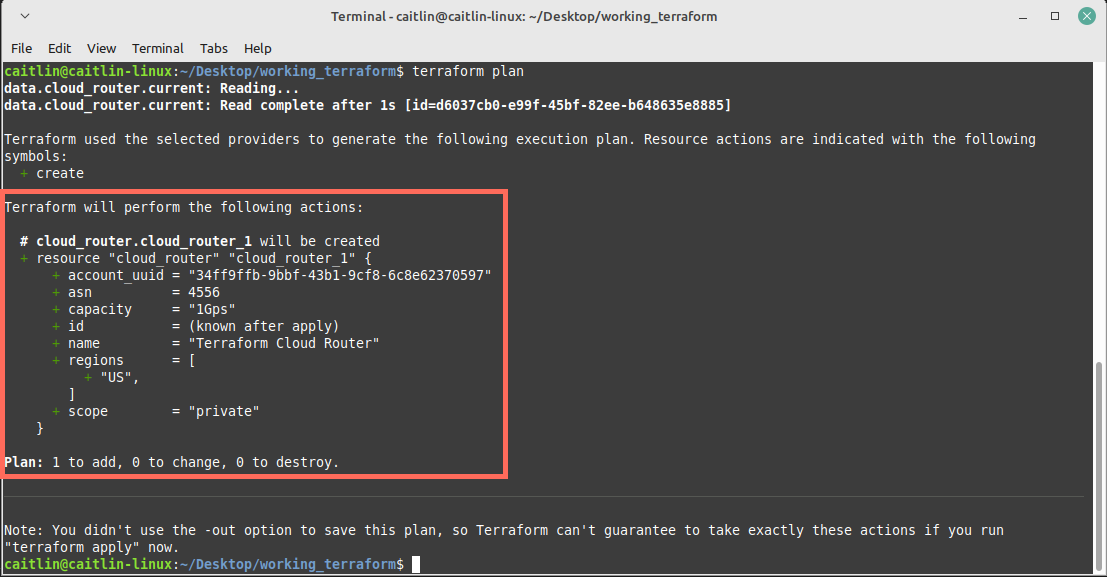
Plan
Enter the following command: terraform plan
This will again display any error messages regarding your configuration.
Once executed successfully, it will tell you what Terraform will do if you apply the current configuration. In this case, it will create a new Cloud Router:
Apply
Enter the following command: terraform apply
When prompted, enter yes.
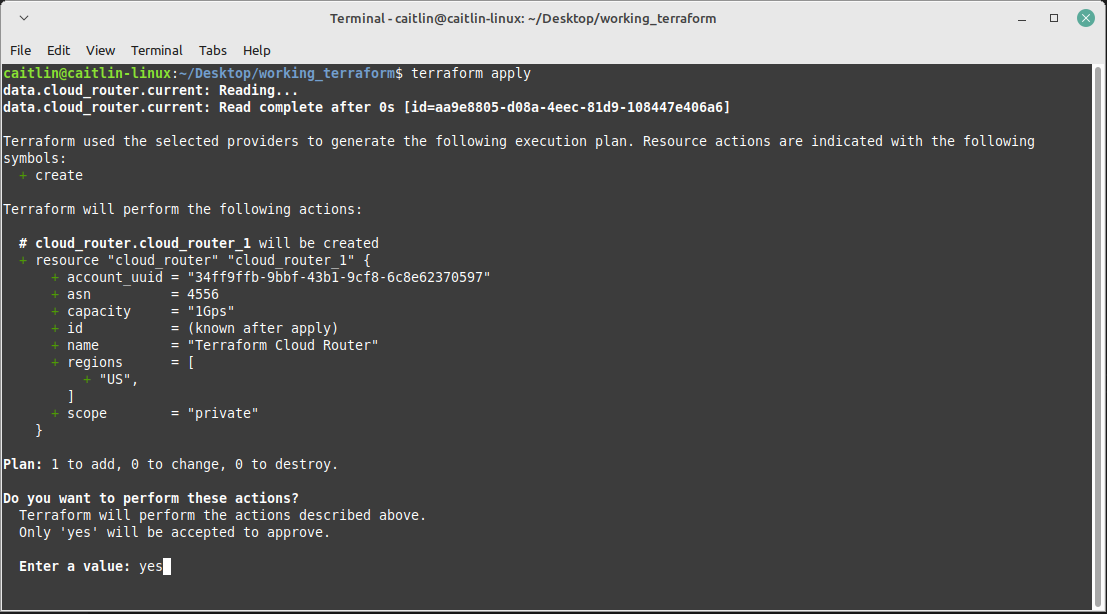
If executed successfully, this will create your new Cloud Router using the information supplied by the variables.
Additional examples
Each time you make changes, run terraform apply to apply those changes.
You can only use Terraform to modify resources that were created via Terraform. For example, you cannot use Terraform to delete a Cloud Router that you created using the PacketFabric portal.
Specify attributes directly
You do not have to use the variables provided. If you do not want to change the default values, but want to modify some values for a specific resource, then you can edit them directly.
|
|
Edit a Cloud Router
Not all Cloud Router attributes can be changed (for example, you cannot change the ASN). But for those that can be changed (such as name, regions, and capacity), you can simply change the value of that attribute.
|
|
Delete a Cloud Router
You can either delete the resource block or comment it out.
# Either delete the following block or comment it out using `/*` and `*/'
/*
resource "packetfabric_cloud_router" "cloud_router_1" {
  provider = packetfabric
  asn          = var.pf_cr_asn
  name         = var.pf_cr_name
  capacity     = var.pf_cr_capacity
  regions      = var.pf_cr_regions
}
*/
Create another Cloud Router
Simply reuse the resource block, but give it a new label.
|
|
Delete a Cloud Router and replace it with a different one
Changing the label (in this case, from cloud_router_1 to cloud_router_2) will tell Terraform to delete the previously created resource and create a new one.
# Changed the label
resource "packetfabric_cloud_router" "cloud_router_2" {
  provider = packetfabric
  asn          = var.pf_cr_asn2
  name         = var.pf_cr_name2
  capacity     = var.pf_cr_capacity
  regions      = var.pf_cr_regions
}
See configuration in the terminal
Adding an output block will display your Cloud Router configuration in the terminal.
resource "packetfabric_cloud_router" "cloud_router_2" {
  provider = packetfabric
  asn          = var.pf_cr_asn2
  name         = var.pf_cr_name2
  capacity     = var.pf_cr_capacity
  regions      = var.pf_cr_regions
}

# Reads the "cloud_router" resource block labeled "cloud_router_2"
output "cloud_router" {
  value = packetfabric_cloud_router.cloud_router_2
}
Use the PacketFabric provider with a Cloud Provider
For an example of how to use the PacketFabric provider with other terraform providers like AWS, Google or Azure, see examples/use-cases
.
Destroy resources
To destroy all the resources you’re managing via Terraform, use the following commands:
terraform plan -destroy to verify what would happen.
terraform apply -destroy to proceed.
For more information, see Terraform - Command: Destroy .