-
Release Notes
- July 8, 2024
- May 22, 2024
- April 17, 2024
- March 20, 2024
- February 22, 2024
- January 18, 2024
- 2023 Releases
- 2022 Releases
-
2021 Releases
- December 20, 2021
- December 1, 2021
- November 22, 2021
- November 4, 2021
- October 26, 2021
- September 30, 2021
- September 22, 2021
- September 2, 2021
- August 16, 2021
- August 2, 2021
- July 19, 2021
- July 1, 2021
- June 17, 2021
- June 1, 2021
- April 30, 2021
- April 8, 2021
- March 25, 2021
- March 15, 2021
- February 25, 2021
- February 8, 2021
- January 28, 2021
- January 21, 2021
- January 13, 2021
- 2020 Releases
- Getting Started
- Ports
- Cross Connects
- Point-to-Point
- Virtual Circuits
- Cloud Connections
- Cloud Router
- Marketplace & IX
- Administration
- Billing
- Troubleshooting & FAQ
- Technical Reference
- Partners Portal
- API & Automation
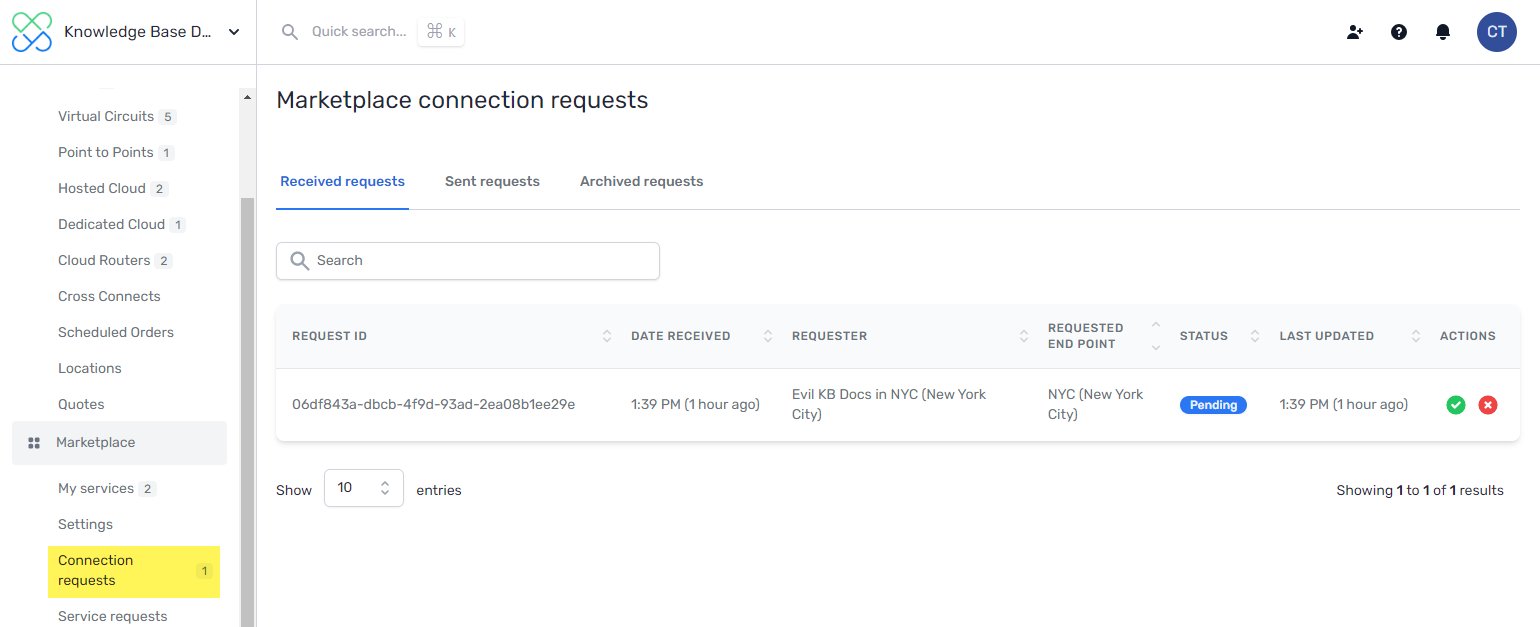
Connection Requests
When you create a marketplace or IX virtual circuit, you send a connection request to the other party (the Z side).
The Z side receives an email alerting them to the request, which they can approve or deny.
To view connection requests and their status, select Connection Requests in the menu on the left:
Provisioned and rejected requests are immediately moved to the Archived tab.
There are three possible statuses:
- Pending: The request has been sent but has not been approved or rejected.
- Provisioned: The Z side has approved the request and provisioned the connection.
- Rejected: The Z side has rejected the request.
A-side actions
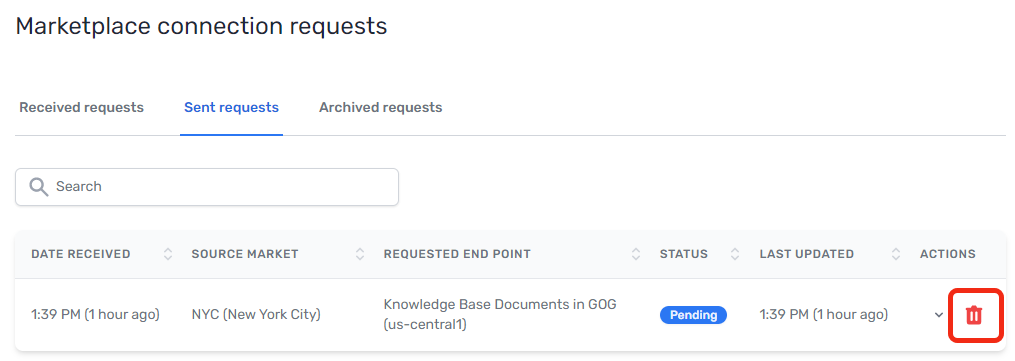
Cancel and delete sent requests
You can cancel a sent connection request as long as it is still pending or if it has been rejected.
-
From the Sent Requests tab, click Delete Request next to the request you want to cancel:
-
A new window opens.
-
Enter DELETE in the field provided.
-
Click Confirm.
The other party is notified that the request has been deleted.
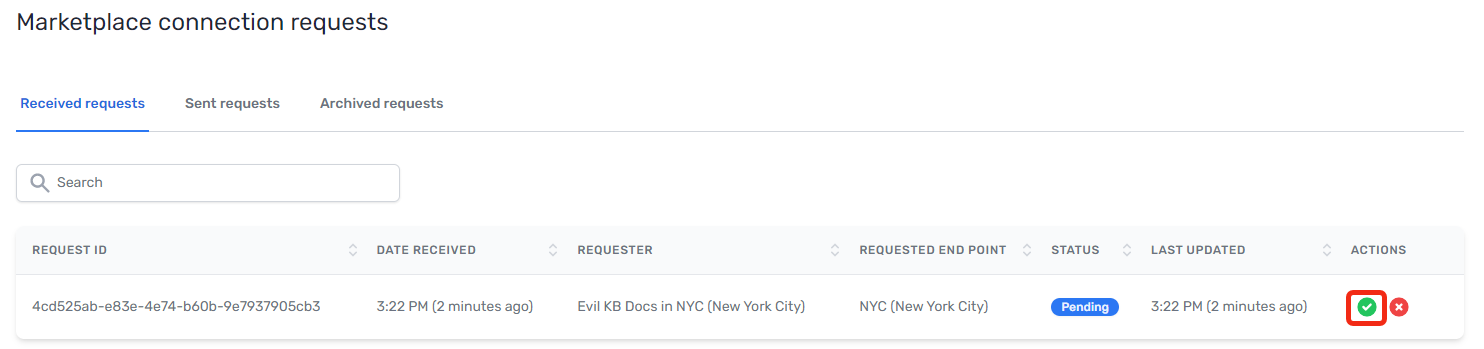
Z-side actions
Provision requests
-
From the Received requests tab, click the provision icon next to the request you are accepting:
You are redirected to the Accept Marketplace connection request page.
-
Select a port in the location in which to provision the connection.
This was the location that the A side selected when creating their request.
-
Under Configuration, complete the following fields:
- Source VLAN: You can manually enter a VLAN ID or click Next Available. If you click Next Available, we find the highest in-use VLAN ID and increment by one. For example, if the highest in-use ID is 15, this field autopopulates with 16.
- Make this an untagged VLAN: If available, decide whether you want the VLAN tagged or untagged.
- Description: Provide a meaningful name for the connection.
-
Click Provision.
Reject requests
When you reject a request, the requester is notified.
From the Received requests tab, click the reject icon next to the request you are rejecting:
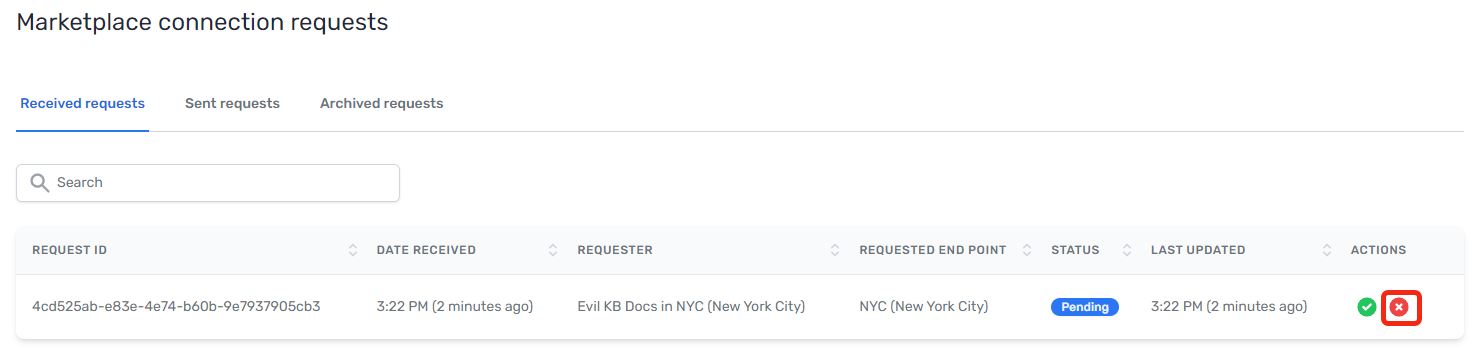
A confirmation window appears. Click Cancel or Confirm.
Related APIs
Updated on 02 Mar 2026