Create a Hosted Connection to Google
The process for adding a Google connection depends on whether you are using a Google Cloud access key :
- Provision with a key - From the PacketFabric portal you can provision the connection, create the VLAN attachment, and automatically accept it from the Google side.
- Provision without a key - You must create the VLAN attachment in the Google Cloud console and then create the Hosted cloud connection in the PacketFabric portal. Then return to the Google Cloud console to accept the connection.
Provision using a Google Cloud access key
Prerequisites
- A VPC created through your Google Cloud account. For more information, see Google Cloud - Using VPC networks .
- A PacketFabric access port. For more information, see Create a Port .
- A Google service account and key. For more information, see Google Cloud Access Keys .
- Enable the Compute Engine API (ensure you are in the correct project).
Create the Hosted connection and the VLAN attachment
-
Log in to the PacketFabric portal. Select Hosted Cloud from the menu on the left.
-
From the Hosted Clouds page, click Create Hosted Cloud in the upper right.
NOTE: Read Only users do not see this action. If you need to create a connection and have Read Only permissions, contact your account administrator.
Complete the following fields:
Select Cloud Provider
Select Google Cloud.
Select Source
Select the source port. The source port is the PacketFabric access port directly connected to your network.
If there is nothing to select, provision a new port .

Configuration
- OnRamp
- The Google Cloud on-ramp location. This cannot be changed after it is provisioned.
- Speed
- The speed you want for your connection.
- Source VLAN
- This is the VLAN ID that faces your source interface (your source network).
- You can manually enter the ID or click Next Available. If you click Next Available, we find the highest in-use VLAN ID and increment by one. For example, if the highest in-use ID is 15, this field autopopulates with 16.
-
NOTE: This field is not available if provisioning a marketplace-to-cloud connection. In that case, the marketplace provider will be expected to specify the VLAN when accepting the connection.
- Description
- Enter a brief description for the connection.
- Provision Google Cloud side of the connection
- Select this option.
- Region
- Select a Google Cloud region. This will determine which Google Cloud Routers are available for selection.
- We recommend that you select the same region as the on-ramp you selected above.
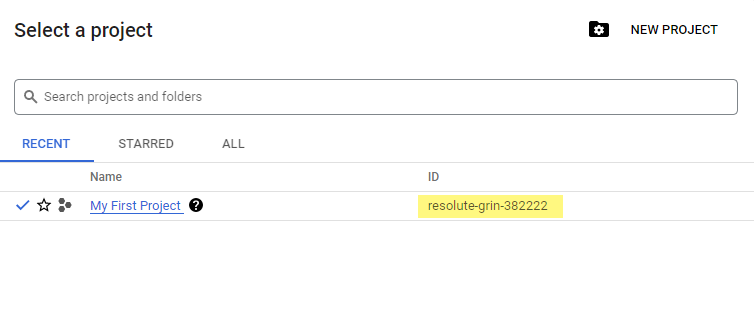
- Project ID
- (Optional)
- Enter the ID associated with the Google Cloud project. The credentials you are using must have the necessary permissions for the project.
- Leave this field blank to select the project associated with the Google Cloud credentials.
- VLAN attachment
- Enter a name for the VLAN attachment.
- Edge availability domain
- The availability domain for the VLAN attachments.
- If you are provisioning redundant connections in the same location, select a different availability domain for each.
- Google Cloud Router
- Here you can select an existing Cloud Router or create a new one. Only Cloud Routers located in the region above appear in the drop-down list.
- Cloud Routers are tied to a single region and VPC, so in many cases you will likely be creating a new Cloud Router.
- However, if you are creating a redundant VLAN attachment, you will want to select the same Cloud Router as the primary VLAN attachment but a different edge availability domain.
- Note that each region can support up to 5 Cloud Routers .
- Network VPC
- If you selected an existing Cloud Router, this field is pre-populated and cannot be changed.
- If you created a new Cloud Router, select an available VPC.
- Google BGP ASN
- The Google Cloud Router ASN should be 16550.
- The exception is if you are routing traffic between two VLAN attachments. In which case, you can edit the ASN to 64512-65534 or 4200000000-4294967294.
- BGP Customer Router’s ASN
- The ASN to use with your router when establishing the BGP session.
- This can be public or private from 1 to 4294967294.
Advanced settings
-
VLAN attachment MTU - Select the MTU for the VLAN attachment.
-
Keepalive interval - This is the interval in seconds between BGP keepalive messages that are sent to the peer. If set, this value must be between 20 and 60. The default is 20.
-
BGP authentication key - Optionally, supply an authentication key to use MD5 authentication with the BGP session.
-
BFD settings - Click Enable BFD to enable Bidirectional Forwarding Detection.
- Mode - The initialization mode:
Disabled- You can leave BFD disabled while configuring your other settings.
Active- The Google Cloud Router initiates the BFD session for this BGP peer. At least one router in the connection must be Active.Passive- The Google Cloud Router waits for the peer router to initiate the BFD session for this BGP peer. - Interval - The interval (in milliseconds) at which to send control packets to peers. The default is 300 ms, and you can enter a value from 3 to 30000 ms.
- Multiplier - The multiplier is the number of consecutive packets that can be lost before BFD considers a peer down and shuts down BGP. The default is 5, and you can enter a value from 5 to 16.
For more information on configuring BFD, see Google Cloud docs - Bidirectional Forwarding Detection (BFD) overview .
NOTE: Your BFD settings are only saved if the VLAN attachment uses Dataplane version 2. For information on how to check, see Google docs - BFD limitations. - Mode - The initialization mode:
-
Prefixes to advertise - The prefixes to advertise to your on-premises network. By default, this is populated with the subnets in the VPC you selected above. However, you can add or modify the subnets. If no prefixes are provided, the advertisement mode will be set to Default.
Under the billing section on the right, select a term and the appropriate billing account to use. You can also optionally specify a PO number to associate with the service. The PO number will be included on your monthly invoice.
Click Place order.
The connection might take a few minutes to provision.
Download a sample router config
Once the connection is provisioned, you can go to the details page of the Hosted connection.
From the Cloud Settings tab, click Download sample config:
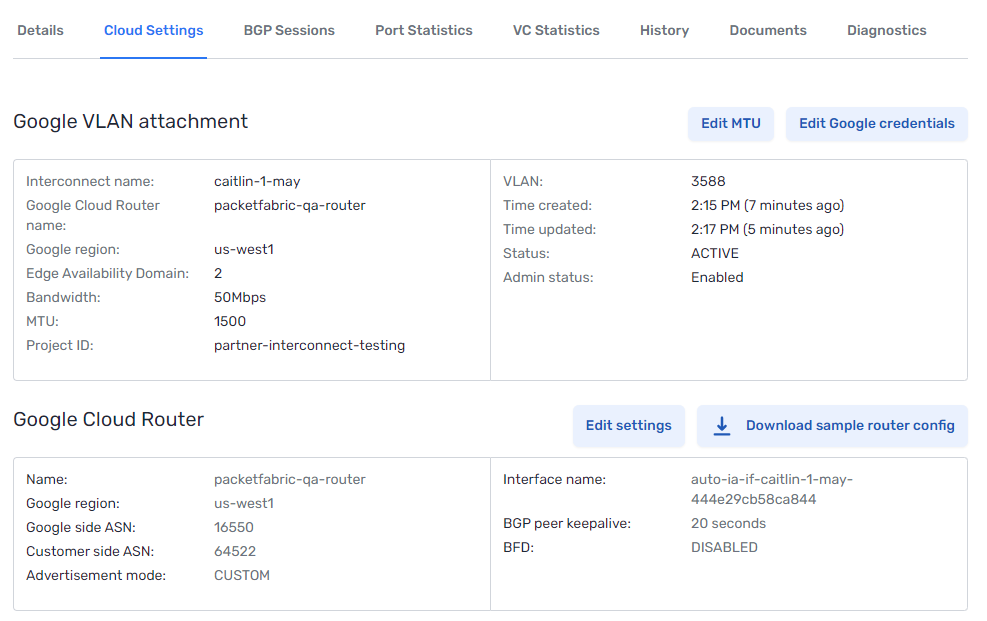
From here you can select your router (or similar) and get a sample configuration file.
Provision without using a Google Cloud access key
Prerequisites
- A VPC created through your Google Cloud account. For more information, see Google Cloud - Using VPC networks .
- A PacketFabric access port. For more information, see Create a Port .
Create a VLAN attachment in Google Cloud Console
-
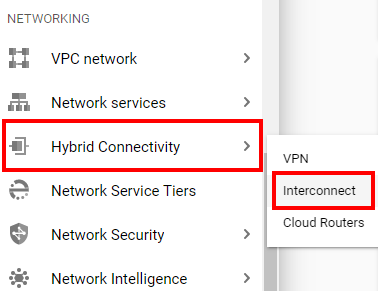
Click the menu in the upper right to open the product list.

-
Scroll down to Networking and select Hybrid Connectivity > Interconnect.
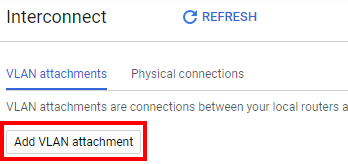
-
If you already have previous VLAN attachments, click Add VLAN Attachment. Otherwise, click Get Started.
-
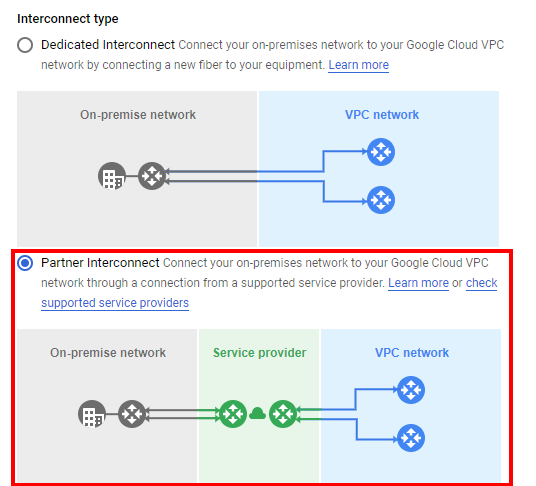
Select Partner Interconnect and then click Continue.
-
Click I already have a service provider.
-
Complete the following fields:
-
Header row
- Field
- Description
-
r1
- Redundancy
- Select whether you are creating a single attachment, redundant attachments, or adding a redundant attachment.
-
r1
-
Network
-
Select the VPC to which you will be connecting.
For more information about creating VPCs, see Google Cloud - Using VPC networks.
-
-
r1
-
Region
-
Select the region in which you want to connect. PacketFabric on-ramps can serve all of Google’s U.S. regions and northamerica-northeast-1 (Montreal).
Internationally, all of Google’s European regions are accessible from our London on-ramp.
Our Sydney on-ramp serves Google’s australia-southeast-1 regions.
-
-
r1
-
Cloud Router
-
Note - This refers to Google’s Cloud Router product, which is not related to the PacketFabric Cloud Router.
If you have already configured a Cloud Router for the selected region, you can select it. If you are creating redundant VLAN attachments, each attachment requires its own Cloud Router.
Otherwise, create a new cloud router.
IMPORTANT: You must select or create a Cloud Router with its Google ASN set to 16550. This is a Google requirement for all Partner Interconnects.
-
-
r1
- VLAN attachment name
- Enter a name for this VLAN attachment.
-
r1
- Description
- Optionally, enter a description for this VLAN attachment.
-
r1
- Maximum transmission unit (MTU)
- Select an MTU for the VLAN attachment. PacketFabric supports up to 9000 bytes MTU.
-
-
Click Create.
-
Copy the pairing key . You need this when creating your hosted connection from the PacketFabric portal.
-
Leave the Enable option unselected.
-
Click OK.
Create a Hosted cloud connection in the PacketFabric portal
-
Log in to the PacketFabric portal. Select Hosted Cloud from the menu on the left.
-
From the Hosted Clouds page, click Create Hosted Cloud in the upper right.
NOTE: Read Only users do not see this action. If you need to create a connection and have Read Only permissions, contact your account administrator.
Complete the following fields:
Select Cloud Provider
Select Google Cloud.
Select Source
Select the source port. The source port is the PacketFabric access port directly connected to your network.
If there is nothing to select, provision a new port .
Configuration
- OnRamp
- The Google Cloud on-ramp location. This cannot be changed after it is provisioned.
- Speed
- The speed you want for your connection.
- Source VLAN
- This is the VLAN ID that faces your source interface (your source network).
- You can manually enter the ID or click Next Available. If you click Next Available, we find the highest in-use VLAN ID and increment by one. For example, if the highest in-use ID is 15, this field autopopulates with 16.
-
NOTE: This field is not available if provisioning a marketplace-to-cloud connection. In that case, the marketplace provider will be expected to specify the VLAN when accepting the connection.
- Description
- Enter a brief description for the connection.
- Provision Google Cloud side of the connection
- Leave this unselected.
- Pairing key
- Enter your GCP pairing key . This is generated when you create a VLAN attachment.
-
NOTE: The trailing
/1and/2indicate which interconnect path your PacketFabric circuit should follow. The primary VLAN attachment ends in/1and the redundant attachment ends in/2. - VLAN attachment name
- Enter the exact VLAN attachment name you provided to Google.
Under the billing section on the right, select a term and the appropriate billing account to use. You can also optionally specify a PO number to associate with the service. The PO number will be included on your monthly invoice.
Click Place order.
The connection might take a few minutes to provision.
Redundant VLAN attachments
Redundant VLAN attachments are optional. However, Google’s SLA does not cover VLAN attachments unless they are part of a redundant pair.
Every redundant VLAN attachment must have a corresponding PacketFabric Hosted Cloud Connection.
Each VLAN attachment has a unique pairing key.
IMPORTANT: A VLAN attachment is not considered redundant unless it is specifically created as a “redundant” attachment through Google.
In the Google Cloud Console, this means selecting Add a redundant VLAN to an existing VLAN or Create a redundant pair of VLAN attachments.
Redundant attachments can be identified by the trailing /2 in their pairing key.
Activate your attachment
-
Once provisioning is complete, return to the Google Cloud Console.
-
Refresh the page. Note that the VLAN attachment status is now Activation needed.

-
Click Activate.
-
Click Accept.
-
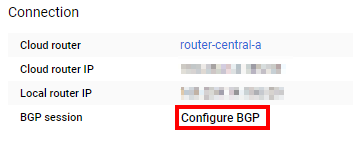
Under Connection, click Configure BGP.
-
Enter your ASN into the field provided and click Save and continue.
-
From the VLAN attachment page, click Activate.

Next steps (all users)
Configure your routers as needed. For more information, see Configuring on-premises router settings .
Next steps (marketplace-to-cloud users)
Your connection remains disconnected until the other party accepts your request. Billing does not begin until the other party accepts and your circuit is provisioned.
You can cancel the request or view status under Network > Connection Requests. Click Sent Requests.
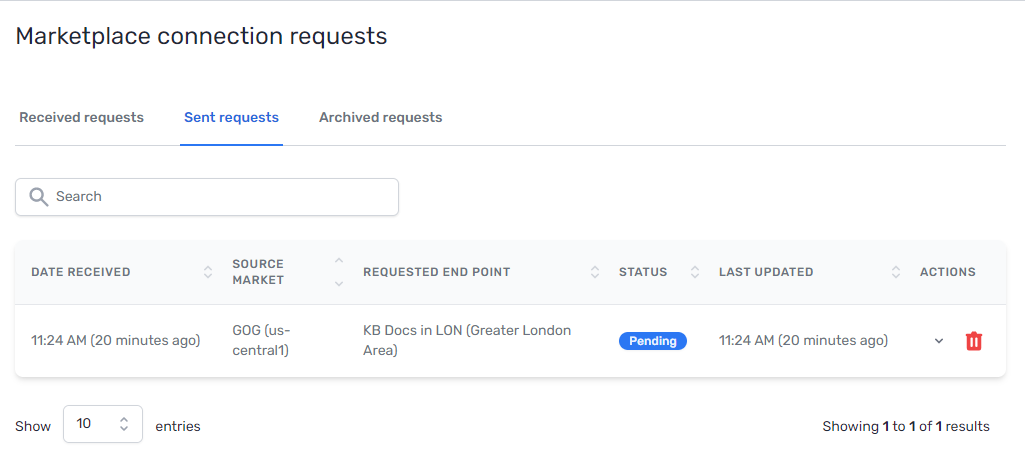
For more information, see Connection Requests .
Related links
- Google - Creating VLAN Attachments
- Google - Activating Connections
- Google - Partner Interconnect Troubleshooting