-
Release Notes
- July 8, 2024
- May 22, 2024
- April 17, 2024
- March 20, 2024
- February 22, 2024
- January 18, 2024
- 2023 Releases
- 2022 Releases
-
2021 Releases
- December 20, 2021
- December 1, 2021
- November 22, 2021
- November 4, 2021
- October 26, 2021
- September 30, 2021
- September 22, 2021
- September 2, 2021
- August 16, 2021
- August 2, 2021
- July 19, 2021
- July 1, 2021
- June 17, 2021
- June 1, 2021
- April 30, 2021
- April 8, 2021
- March 25, 2021
- March 15, 2021
- February 25, 2021
- February 8, 2021
- January 28, 2021
- January 21, 2021
- January 13, 2021
- 2020 Releases
- Getting Started
- Ports
- Cross Connects
- Point-to-Point
- Virtual Circuits
- Cloud Connections
- Cloud Router
- Marketplace & IX
- Administration
- Billing
- Troubleshooting & FAQ
- Technical Reference
- Partners Portal
- API & Automation
Create and Manage Virtual Circuits for Dedicated Cloud Connections
Use a virtual circuit to connect a PacketFabric source port to your dedicated cloud port. Hosted cloud connections do not require a separate virtual circuit.
Add a virtual circuit
You can build multiple virtual circuits, with varying capacities and from multiple locations, to each dedicated cloud port.
-
From the PacketFabric portal, select Dedicated Cloud on the left.
-
Click Create Virtual Circuit in the upper right of the page.

Complete the following fields:
Select Source
Select the source port. The source port is the PacketFabric port connected to your network.
Select Cloud Provider
Select a dedicated cloud port.
Configuration
- Speed
- Select the speed/capacity for your virtual circuit. The speeds that are displayed are those that are compatible with the speeds you selected for your source and destination interfaces.
- Source VLAN
- This is the VLAN ID that faces your source interface (your source network).
- You can manually enter the ID or click Next available. If you click Next available, we find the highest in-use VLAN ID and increment by one. For example, if the highest in-use ID is 15, this field autopopulates with 16.
- Select Make source untagged if you do not plan on using VLAN tagging.
- Destination VLAN
- The VLAN ID that faces your cloud virtual interface.
- Select Make destination untagged if you do not plan on using VLAN tagging.
-
NOTE: For cloud connections, we recommend using the same VLAN ID for both the destination and source.
VLAN IDs can always be added, changed, and removed by editing the virtual circuit.
- Description
- Enter a name for the connection.
Billing
The cost for dedicated cloud virtual circuits is already built into the cost of the port, so all payment terms are $0.00.
Regardless, you still must select the appropriate billing account to associate with this service.
Review your information. When everything is correct, click Place order.
Next steps
Create a corresponding virtual connection from the dedicated port to the cloud provider. You can do this through the cloud service provider’s portal or their API.
Amazon Direct Connect: Creating a Virtual Interface- AWS Direct Connect
Google Cloud Interconnect: Creating VLAN Attachments - Google Dedicated Interconnect
Microsoft Azure ExpressRoute Direct: About ExpressRoute Direct
View virtual circuit details
For information about virtual circuit details pages, see Virtual Circuit Details.
Edit or delete a virtual circuit
When working in the portal, you can manage a dedicated cloud virtual circuit from two places:
- The Virtual Circuits page
- The Dedicated Cloud page
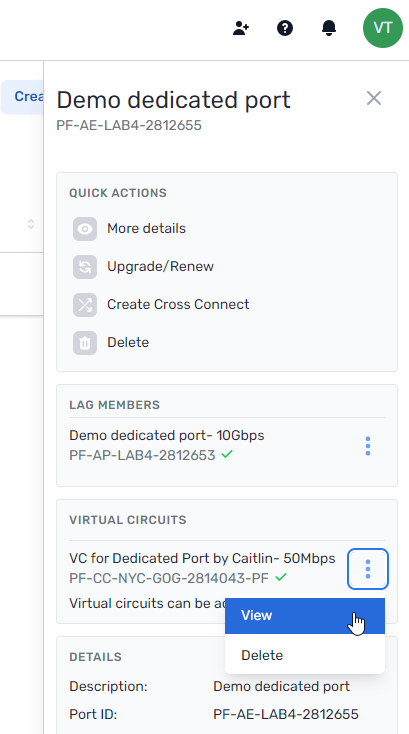
If working from the Dedicated Cloud page, you can access the dedicated cloud port’s virtual circuits by clicking the dedicated connection to open its side panel.
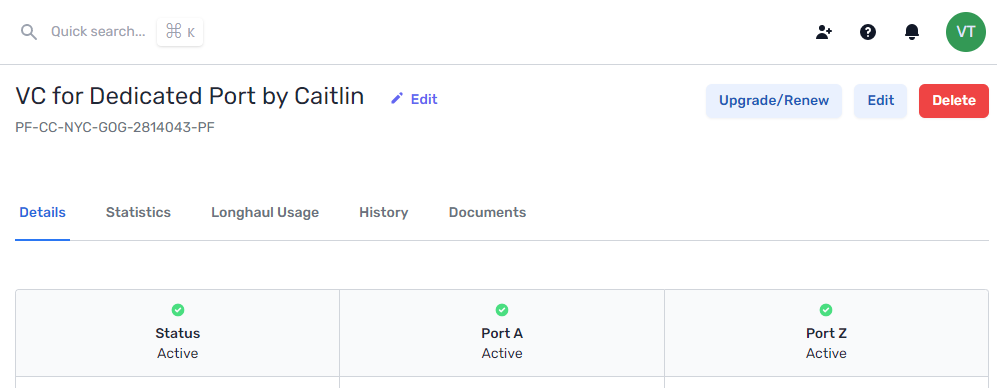
Click the overflow menu and then View to go to the virtual circuit’s details page.

From here you can access actions for the virtual circuit:

When you click Edit in the upper right, you can update the virtual circuit description, VLAN tags, and rate limits (if applicable).
Related APIs
Updated on 10 Nov 2022